People try a clothing swap online expecting either a magic fitting room or a gimmick. The truth sits between the two. This explainer covers the mechanism, photo tools versus live video, which reference images give clean results, and where the technology still guesses. The live version discussed here is LiveGen's Outfit Swap mode, which runs in a browser tab on desktop or mobile with nothing to install.
Key takeaways: what an AI clothing swap can and cannot do
- The model needs two inputs: a view of the person (a photo or a camera feed) and one reference image of the garment.
- It tracks body and pose so the clothes move with the person, while face, hair, and background are preserved.
- Photo tools give you one finished frame. Live video tools generate the outfit continuously while you move, so you can check it from several angles.
- Clean, front-facing garment images work best. Flat lays and on-model shots both work, with different strengths.
- Size, fit, fabric weight, and sheerness are estimated, not measured. Fine prints, logos, and text often warp.
What happens inside a clothing swap, from reference image to live frames
Every AI clothing swap, on a photo or a camera feed, solves the same three problems.
Reading the garment. The model works out what the clothing in your reference image is: its category, color and pattern, neckline and sleeve length, and roughly how the fabric behaves. It gets no pattern file or 3D mesh. It gets pixels and infers the rest.
Reading the person. It estimates where the shoulders, arms, torso, and legs are, which way they face, and which parts are hidden. This is the body and pose tracking step. It also separates the regions to change (the clothed areas) from the regions to leave alone (face, hair, hands, and the room behind you).
Drawing the result. It generates new pixels for the clothed region so the garment appears to sit on that body, in that pose, under that lighting. Folds appear at the elbows and a hem follows the hips. Everything outside that region is kept, which is why you still look like you in your own room.
The difference between tools is when and how often that third step runs.
Batch tools, which covers most photo apps and most video clothes swap services, work offline. You upload an image or a clip, a server renders it frame by frame, and minutes later you get a file back. If the sleeve looks wrong, you change the input and render again. The upside: the server can spend a long time on each frame.
Live generation works differently. Your camera streams to LiveGen's real-time engine over WebRTC, and the transformed video streams back while you are still moving. Frames are produced continuously, so you see the outfit respond as you raise an arm or turn sideways, and you can fix the framing or swap the reference on the spot. The honest trade-off: live generation favors responsiveness over per-frame polish. Printed text, tiny patterns, hands crossing the torso, and fast motion can look softer than in a slow offline render.
Photo-based vs live-video clothing swap: which one fits your goal
A photo-based swap is the right tool when you need one polished still: a product mockup, a profile image, a lookbook frame. It is also how most model clothes swap workflows run, where a brand puts one garment on a catalog model image. The limit is that a single frame hides how the garment behaves from the side or when the person sits down.
A live-video swap is the right tool when movement is the point: recording a short clip, showing an outfit on stream, or checking a look from several angles. Because the result follows you, problems show up immediately and you can adjust.
LiveGen splits this territory three ways, and it helps to pick the right door:
- Outfit Swap is the creating mode: the full feature for making clips and live looks.
- The AI clothes changer tool is the quick start, with the fewest decisions.
- Virtual try-on is for buying decisions, and it spells out what a preview can and cannot tell you.
Running a live clothing swap in the Studio, one step at a time
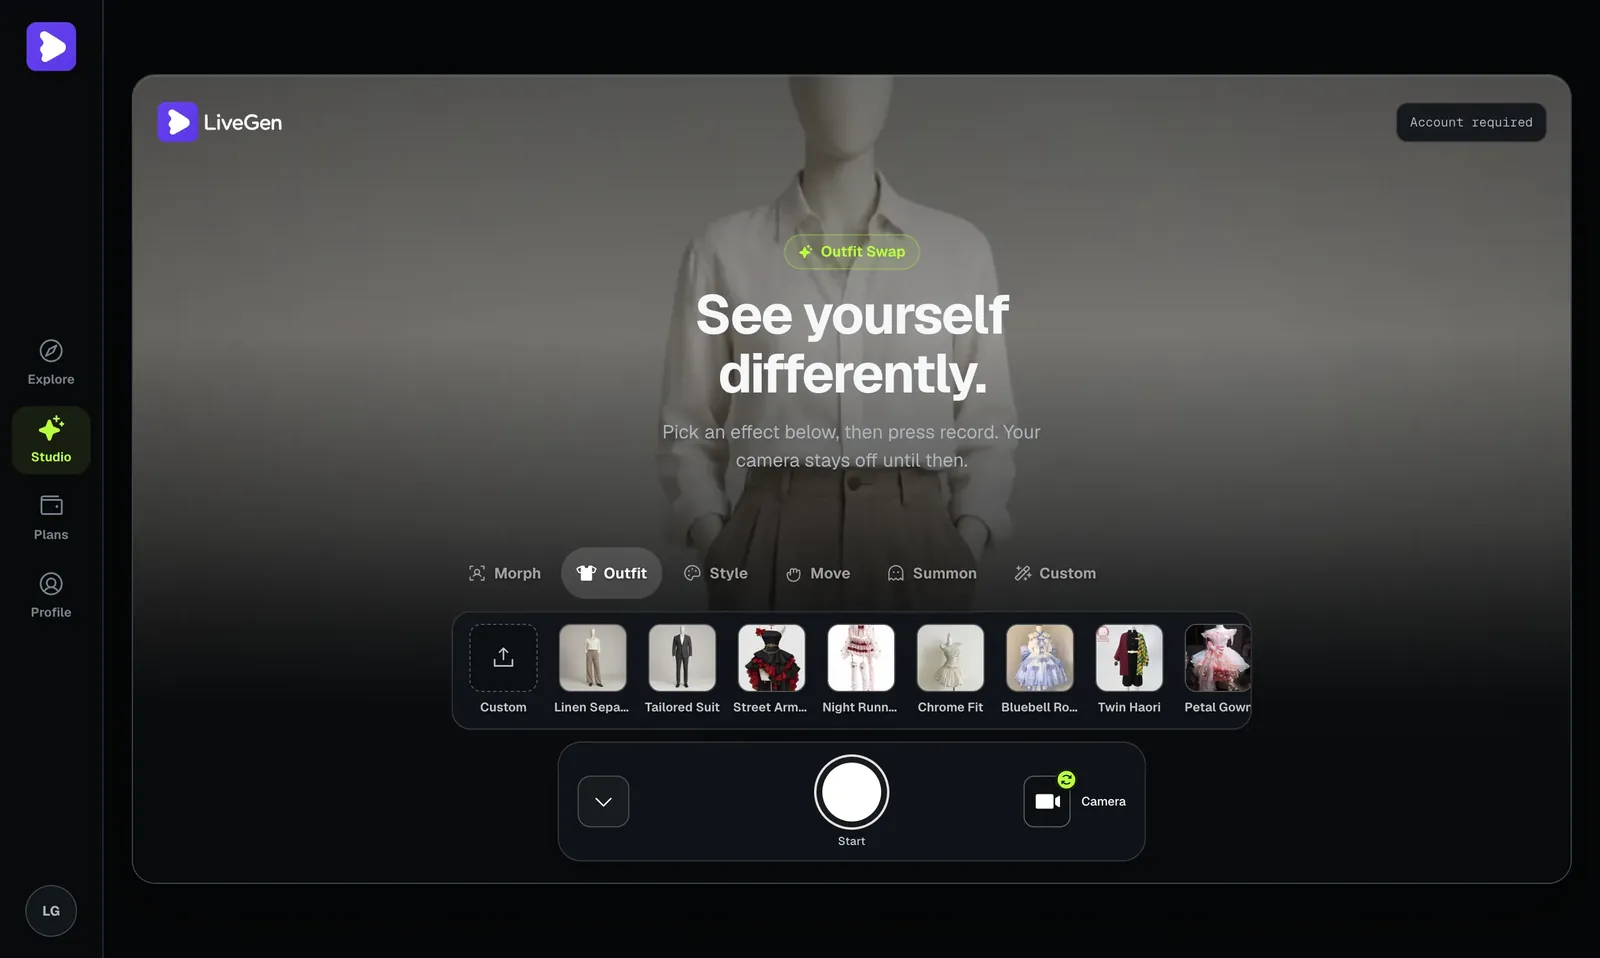
If you would rather start from a ready-made idea, the Explore page collects guided plays. One of them, Dress Code, is built around outfit changes.

Generation is metered in credits, one credit per second of live video, and LiveGen is free to try. Free exports carry a watermark, and paid plans remove it and add HD. Current plans are on the pricing page.
Flat lay or on-model: choosing a garment reference image
Flat lays and ghost-mannequin shots show the garment alone on a plain background. They give the cleanest read of color, pattern, and construction. The weakness is drape: a shirt lying flat says little about how it hangs, so the model fills that in.
On-model shots carry real information about drape, length, and proportion, which often makes the result look more natural. The risk is contamination: a busy background, a bag strap across the chest, long hair over the collar, or a dramatic pose can leak into what the model thinks the garment is.
Rules that hold for both types:
- Use a front-facing, fully visible garment. A cut-off hem forces the model to invent the missing part.
- Prefer even lighting and a plain background. Hard shadows can be read as part of the pattern.
- One garment or one complete outfit per image. Collages and multi-item flat lays confuse the category read.
- Pick sharp images. A blurry reference gives a blurry garment.
Uploads are moderated and a Content Policy applies.
Where AI clothing swap still guesses or gets it wrong
None of these are bugs in one product. They follow from the method: the model sees pixels, not fabric.
- ✓Size and fit cannot be measured. The model does not know your measurements or the garment's. It will drape a jacket so it looks plausible whether or not the real one would close. A swap can tell you whether you like a silhouette, not whether to order a medium.
- ✓Fabric weight and sheerness are guessed. Heavy wool and thin jersey can look alike in a photo, and the model may pick the wrong behavior. Sheer, mesh, and lace fabrics are especially unreliable.
- ✓Fine prints, logos, and text warp. Small repeating patterns can shimmer or simplify, and lettering often comes out garbled or drifts as you move.
- ✓Layered and very loose garments are hard. An open coat over a shirt over a tee means three surfaces to track. Capes, wide skirts, and oversized fits move more than the model can predict, so edges may wobble.
- ✓Accessories are out of scope. Bags, jewelry, belts, glasses, hats, and shoes are not reliably carried over. Treat the result as the garment only.
- ✓Occlusion causes flicker. Crossed arms, a mug held in front of you, or hair across the shoulders can briefly confuse the garment boundary.
- ✓Fast motion softens detail. A quick spin looks less crisp than a slow turn.
Use a clothing swap to explore looks, make content, and narrow down choices. Use a size chart and a return policy for fit.